
Beautiful lighting can elevate any space, but dust and grime have a way of dulling its impact. Over time, that build-up not only blocks brightness but also compromises your indoor air quality.
Don’t worry, though. With the right methods, you can achieve a spotless finish without risking damage to delicate parts or creating safety hazards.
So, keep reading and follow these practical steps to refresh your lighting and enjoy a clearer, brighter home.
Assess Each Fixture
Every fixture in your home has its own cleaning needs.
The pendant lights hanging above your kitchen island are magnets for cooking oils and occasional splashes. Meanwhile, the ornate chandelier in your living room quietly collects layers of dust until its sparkle starts to fade.
As for your hallway sconces, they catch fingerprints, pet hair, and all the airborne bits that drift by unnoticed.
The material you’re working with plays a huge role, too. Glass fixtures are extremely fragile, so they need streak-free cleaners and a soft touch.
Metal pieces also require special care. Brass develops a rich patina when polished properly, while chrome keeps its mirror-like shine only if handled with patience.
Crystal fixtures are especially delicate. Their countless facets attract dust like magnets, and scrubbing too hard can dull their brilliance permanently.
It all comes down to knowing what each fixture is made from, where it’s placed, and what sort of messes it tends to attract.
And always check the manufacturer’s care guide before you start. It’s rarely thrilling reading, but it can save you from expensive mistakes.
Gather the Right Supplies
Before you dive into your cleaning session, make sure to grab everything you’ll need. Stocking up on the right tools won’t only make the job easier, but it’ll also protect your fixtures from accidental damage.
Microfibre cloths are quite handy, and they trap dust without leaving scratches. You can pair them with soft-bristled brushes to reach tight crevices and decorative details.
Safety comes first when you’re working above eye level. For overhead fixtures, a sturdy ladder is non-negotiable.
Choose one that’s tall enough for the job. Extension ladders work well, but you’ll need to angle them carefully and make sure they’re on a level surface to stay safe.
Protective gloves are another necessity, as they’ll protect your hands from cleaners.
When it comes to cleaners, commercial sprays might feel convenient, but many contain chemicals that are too aggressive for regular use. Instead, you can mix vinegar and water to create a natural, effective solution that won’t leave behind harsh residues.
Prepare the Area for Cleaning
Before you touch anything, switch off the power at the source, and if you’re dealing with hardwired installations, shut down the circuit breaker.
Lay down protective covers around the work area to catch dust, fallen debris, or drips. Next, move nearby furniture to prevent accidental damage. Clearing up the space will also give you more room to move safely.
Keep your cleaning supplies within reach, ideally in a small bucket or organiser you can hook over the ladder, so you don’t have to constantly climb up and down.
If you’re working with large or heavy fixtures, ask someone to spot you. A second pair of hands can steady the ladder, pass you supplies, and make the process much safer.
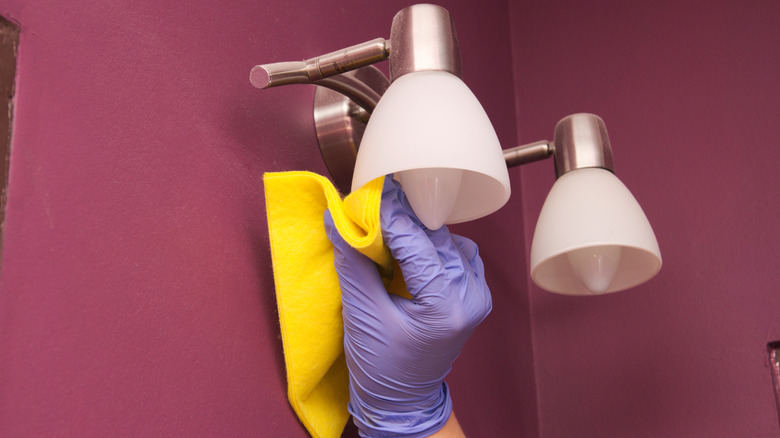
Clean the Glass and Metal Pieces
Once everything is set up and safe, it’s time to turn those dull, dusty fittings back into the bright centrepieces they were meant to be.
If you’re working with removable glass components, start by giving them a good soak in warm, soapy water. This simple step will loosen stubborn deposits and make the actual cleaning much easier.
After this is done, your vinegar-and-water mix and a soft cloth will take care of any lingering residue.
When you’re done, always dry the glass completely, and steer clear of paper towels since they often leave lint behind.
For metal elements, a damp microfibre cloth will work wonders, especially in dust-prone areas. Mild soap and gentle rubbing will remove tougher marks, but always follow the metal’s natural grain to avoid streaks.
When you’re done, dry everything thoroughly to prevent corrosion and extend the life of your fixtures.
Sanitise the Non-Removable Parts
Fixed light fittings need a gentler, more careful technique, since you can’t simply detach and soak them.
Start by dusting the fixture with a dry microfibre cloth to lift away loose particles—this will make the actual sanitising process smoother.
Next, prepare a simple solution of three parts water to one part gentle disinfectant. Dip your cloth in, wring it out well, and gently wipe over the surface.
While working, try to focus on the areas that are frequently touched. Switches and metal surfaces are hotspots for bacteria and deserve extra care. Give the bulbs the same treatment, but only when they’ve cooled down.
If you’re short on time or energy, consider hiring professional help. A housemaid service can handle these tricky fixtures alongside the rest of your home, leaving everything sparkling.
Reassemble and Test the Fixtures
Once everything is spotless, it’s time to put all the parts back together. This is also a good opportunity to make sure that the fixtures are reliable and safe.
Always keep safety front and centre. This starts with working with completely dry hands, as even a trace of sweat can be dangerous.
Now, secure each component carefully. Tighten the screws and check the connections so there are no wobbly parts or loose fittings waiting to cause problems later.
When you’re confident everything is in place, switch the power back on, and test each fixture. Sometimes, a little adjustment or retightening is all it takes to resolve small hiccups.
And if you’re swapping out bulbs, consider LED options. They stay cooler for longer, use less energy, and make the testing phase safer and more comfortable.
If something still isn’t working properly, don’t force it. Calling in a professional electrician is far better than risking damage or injury.
Conclusion
Light fixtures are statement pieces that often cost a small fortune. Besides illumination, they add to the style and decor of any room.
But when they’re covered in dust and grime, all that charm goes unnoticed. So, try out our tips today and enjoy the difference every time you switch the lights on.